Trip Update: June 6, 2024
After my last shakedown run over Memorial Day weekend, I was completing final maintenance on the DRZ to get it ready: fresh tires, chain, brake pads, clutch pack, and a final oil change. Unfortunately, I found some pieces of metal that looked suspiciously like bits of a piston oil seal ring on the drain plug magnet. Somewhat optimistically (and riskily, to be totally honest), I put everything back together and ran the bike for another week.
I did another oil change on 6/6 (about one week before the planned departure date) to make the final call. There were more bits of metal on the drain plug magnet, which confirmed the diagnosis. Given the remoteness and demands of this trip, I will not be running the DRZ for my ’24 Arctic Ocean trip. While the main symptom so far has been increased oil consumption (which makes sense for a blown seal ring), the risk of the ring breaking and lodging itself somewhere important in the engine is just too great.

I’m keeping the bike and will rebuild the engine again when I get back, and I’ll write something up about the bike I’m pivoting to before I leave. I’ll keep this page here for posterity since it was a lot of the prep work leading up to the trip.
Bike Summary
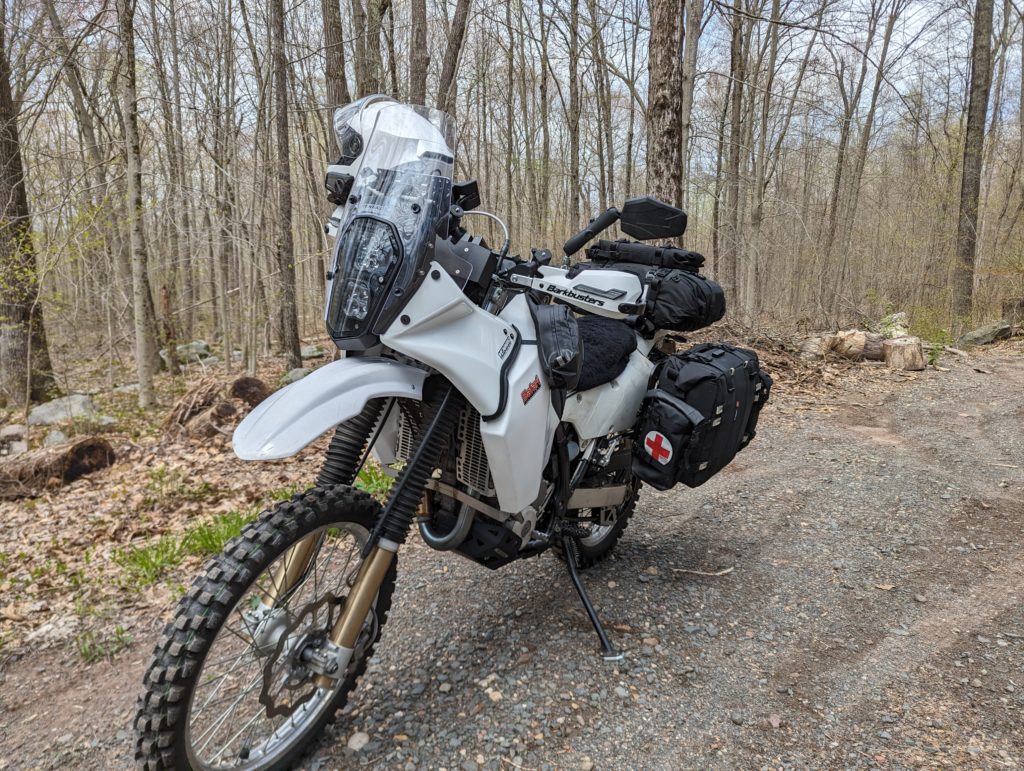
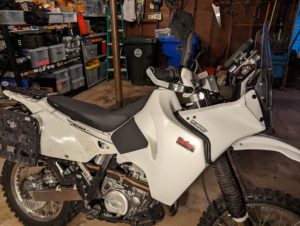
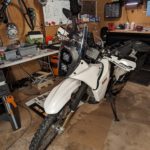
I bought my ’18 DRZ in the spring of 2019 after having more than a few close calls taking my 570 lbs Tiger Explorer off-road. I’d cross shopped against the classic Japanese 650 dual-sports (Suzuki DR650, Kawasaki KLR650, and Honda XR650L) and the newer, performance oriented dual-sports (KTM EXCs, Husqy FEs, and Honda CRF450L) and decided that the DRZ 400S struck a good balance between the reliability/simplicity of the former and the performance of the latter. The DRZ isn’t the best bike at anything, but it’s pretty damned good at a lot.
My off-road skills and confidence improved quickly once I was on a more appropriate bike, and it didn’t take too long to decide to retire my Tiger 1200 from dual-sport duties. A few performance and comfort mods were enough to make the DRZ more than capable for off-road focused day trips and long weekends. As I started venturing further afield it only reinforced that my true riding passion lies in long-distance back country touring (usually solo). It also started to expose some of the limitations of the bike for distance travel. Since a true unicorn off-road focused, lightweight adventure bike hasn’t yet come to market, I decided in December of 2022 that my best option would be to take a lightweight single and build it into my ideal ADV bike — the DRZ was already in my garage so I started there.
Admittedly I probably went a bit overboard with the build, but most of the mods were in direct response to noticing something lacking in the bike and wanting to improve it. I could easily have just traded the bike in for something like a Husqvarna 701 or Tenere 700, but this became something of a passion project for me over the years and I couldn’t be happier with the result.
All in, the build weights in at 385 lbs (with 5 gallons of fuel in the tank, no luggage) compared to 319 lbs for the stock bike (with 2.6 gallons of fuel). The difference in fuel alone accounts for 15 lbs, with the largest single contribution coming from the 20 lbs luggage rack. 385 lbs is heavy for a dual sport, but still very light compared to most adventure bikes (the Himalyan is 432 lbs and the larger, off-road biased Tenere 700 is 452 lbs; both without luggage racks or protection).
Bike Build
I’ve modified or upgraded every major system of the bike to make it more viable for long distance adventure. For covering long distances with luggage, I increased the power of the engine along with upgrading suspension & brakes to cope with the increased weight. In addition to standard bike protection, I updated some of the ergonomics (controls & seat) to make the bike more comfortable. A larger gas tank was fitted to improve fuel range, and I added a frame-mounted fairing to reduce fatigue and provide better mounting for navigation & instrumentation. For luggage, I added tail & pannier racks for attaching soft luggage.
Performance
The performance upgrades for the bike aren’t go-fast parts for the sake of going faster (well, not only for going faster), they were all chosen to help the bike deal with the increased load and demands of long-distance adventure riding.
Engine & Power
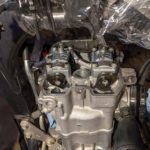
The stock DRZ engine is a bit asthmatic — it produces good, torquey power from idle but gets bogged down in the top end of the rev range. I started with the standard mods of increasing the size of the air intake with the 3×3 mod, upgrading the air filter, rejetting the stock carburetor to match the increased airflow, and upgrading to an FMF Q4 slip-on exhaust. This was enough to really open up the bike and help it breath at higher RPMs, which was especially helpful for street riding.
Unfortunately, the bike still struggled a bit when fully loaded up for travel, especially with off-idle torque off-road. The was most noticeable in challenging hill climbs, where I’d have to slip the clutch quite a bit to avoid stalling and losing moment (and eventually lead to burning out the clutch).
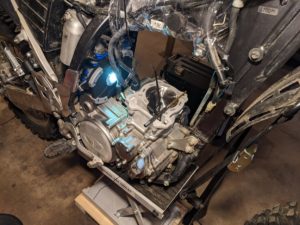
To increase the torque and give the bike a power boost across its entire rev range I needed to open up the engine and make some changes. I decided to install a Cylinder Works big bore kit, Hot Cams Stage 1 camshafts, and completed the exhaust upgrade with the FMF Powerbomb header. To handle the increased power from the engine, I opted for an EBC racing clutch kit with heavy-duty springs.


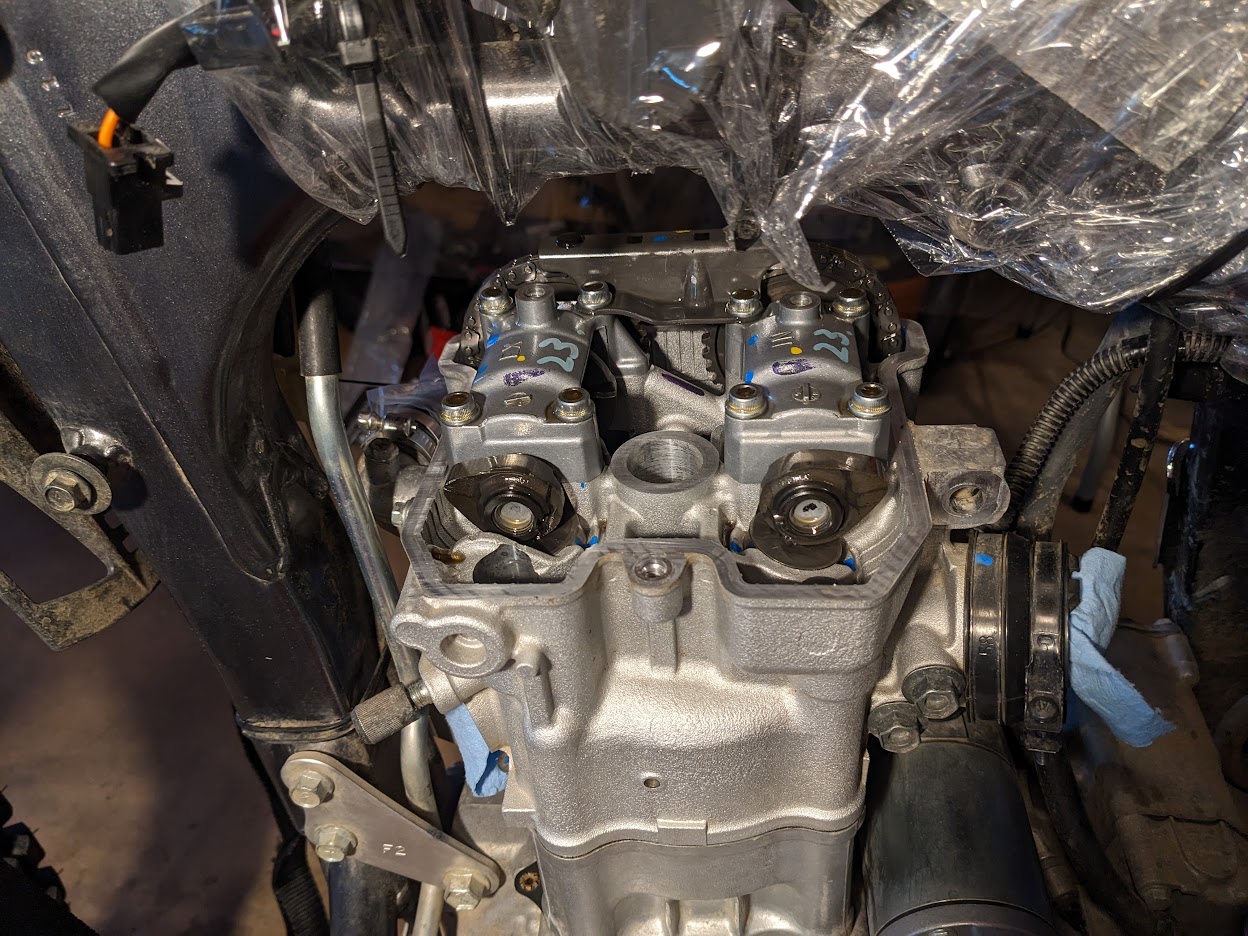
I also installed the Lectron metering rod carburetor. In addition to further improving the fueling, the metering rod design inherently accounts for changes in air pressure from temperature & elevation changes. This should give the bike consistent power for long trips in the mountains without needing to mess with jetting mid-trip.
While I haven’t taken the bike to a dyno to measure the increased power, riders with similar builds have reported around 50 horsepower. Not a bad increase for a bike that starts off with 32.
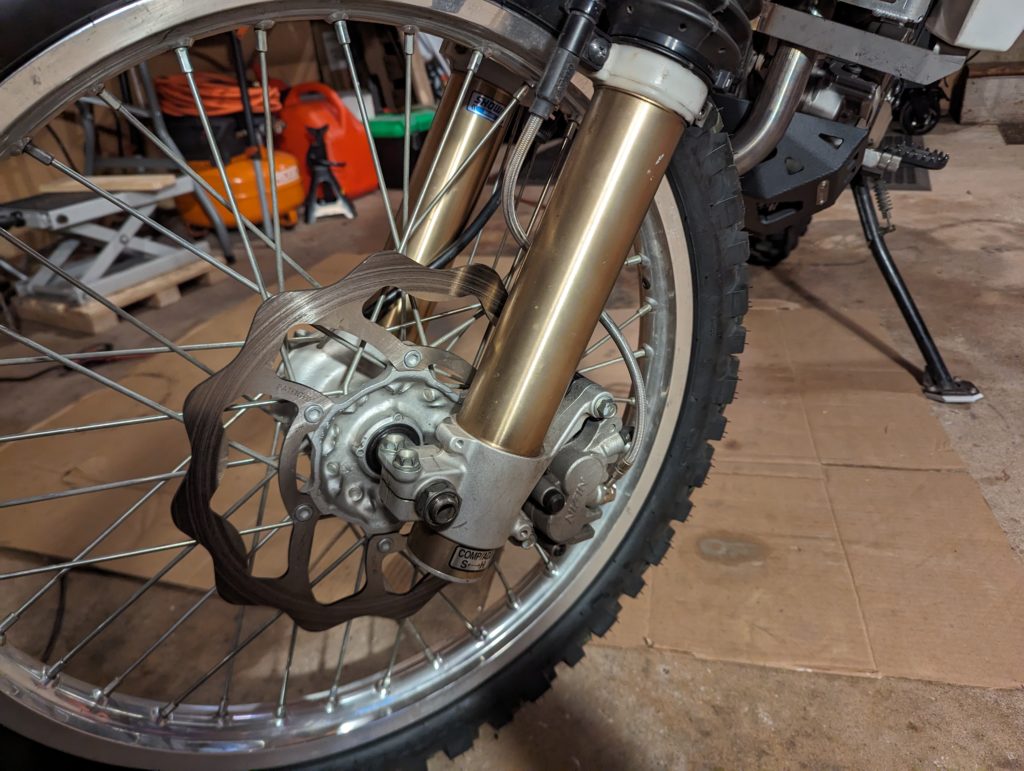
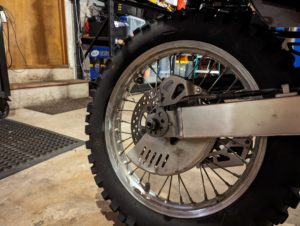
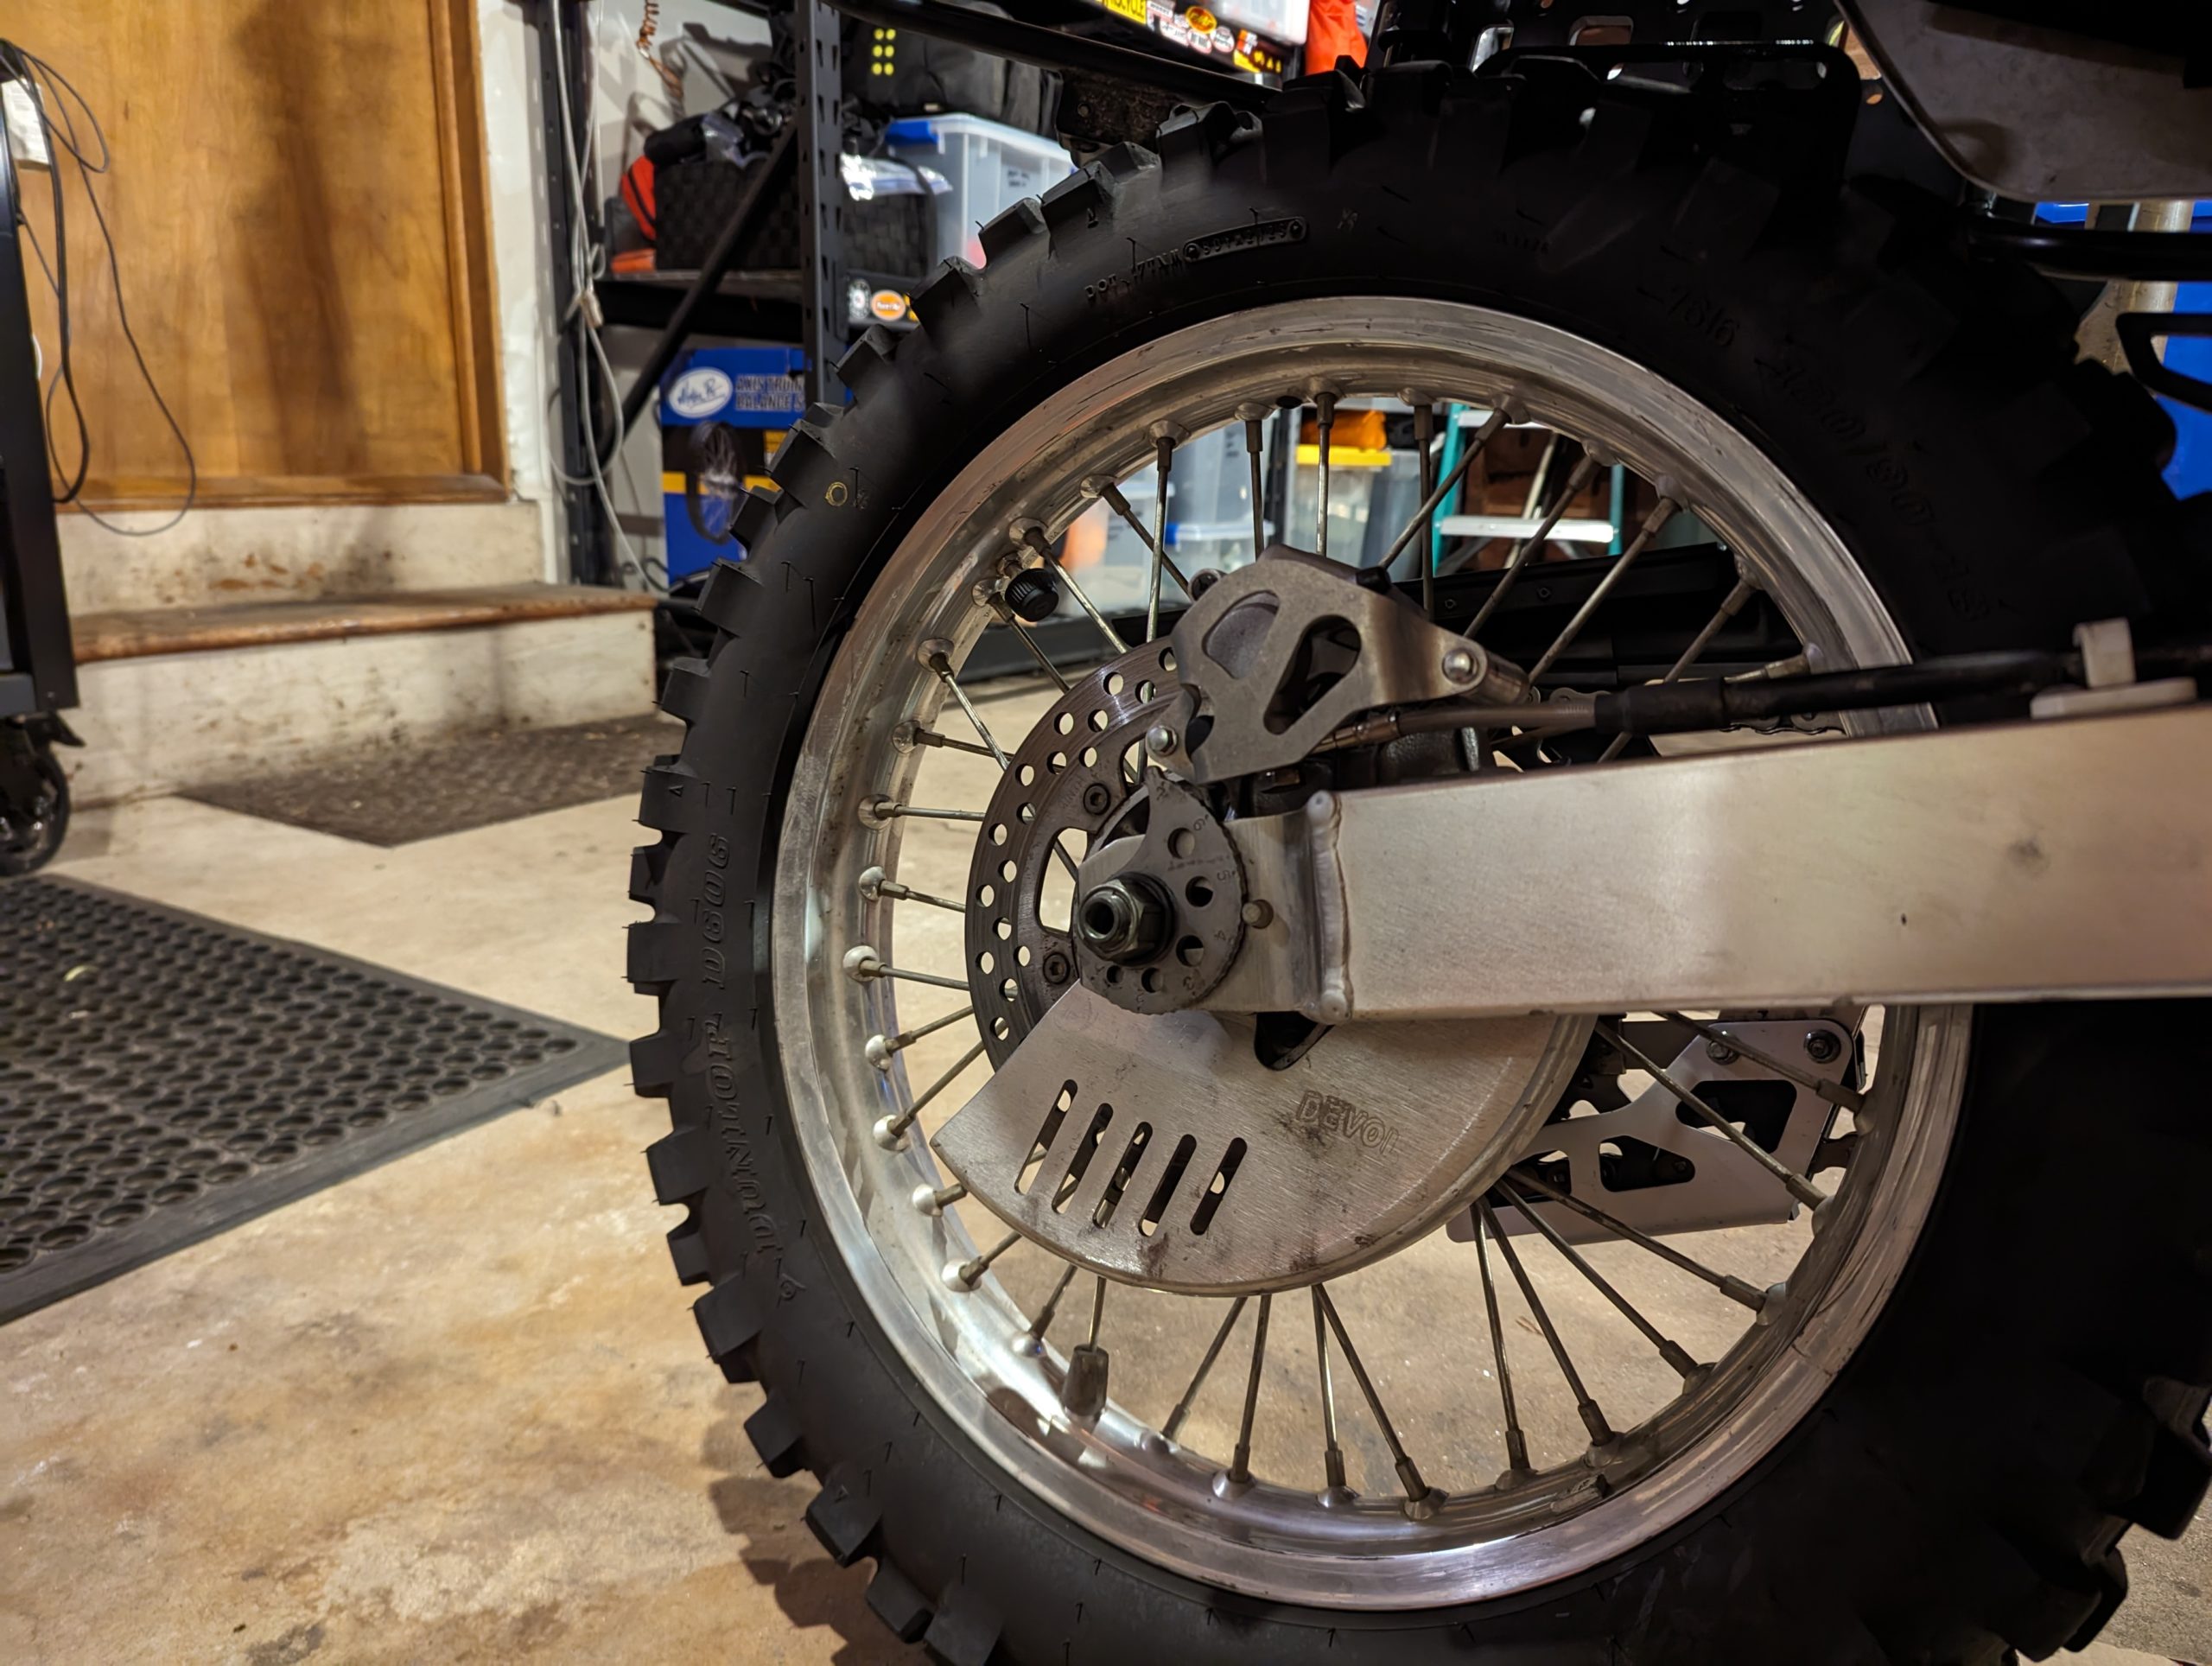
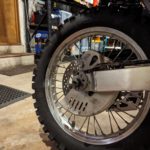
Brakes
The OEM brakes on the DRZ are fine for its intended use, but aren’t quite up to snuff with a fully laden bike. I replaced the stock rubber brake lines with steel lines (front & rear) and upgraded to an oversized Galfer 270mm front brake rotor.
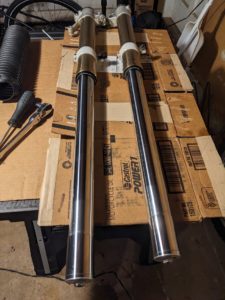
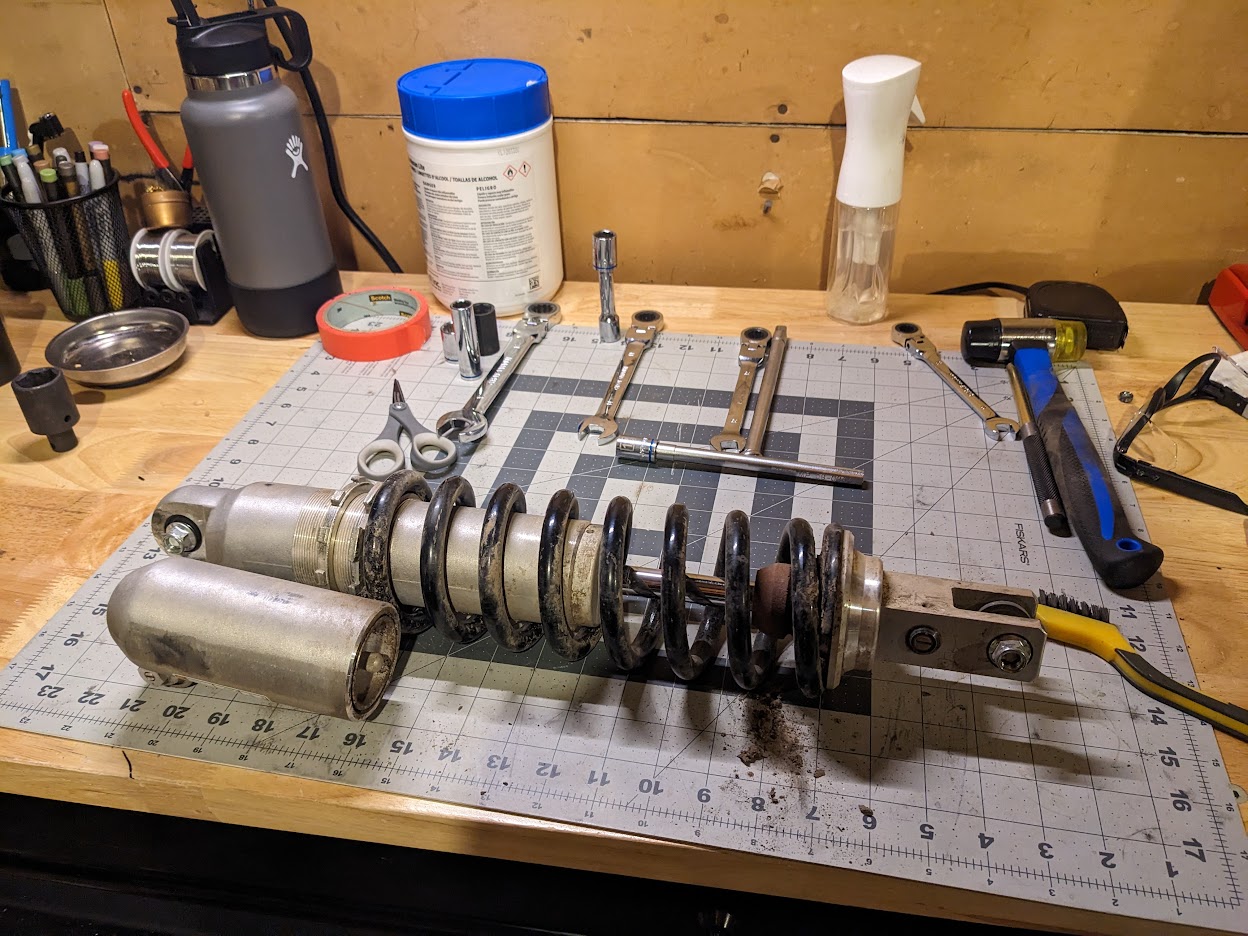
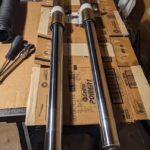
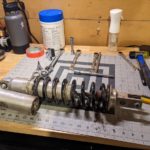
Suspension
The DRZ’s stock, fully adjustable Showa suspension is one of its best features. Unfortunately, it comes sprung for a 170lbs rider with no luggage. To manage the increased weight, I upgraded to quite stiff Racetech springs (0.54kg/mm front, 6.3kg/mm rear). An initial milder set (0.52kg/mm front, 5.7kg/mm rear) was perfectly dialed in for day trips, but was still undersprung when loaded up for a long trip. So far I haven’t had any issues with the damping being able to keep up with the stiffer springs by adjusting the clickers (a side benefit of the DRZ’s suspension generally considered to be over-damped).


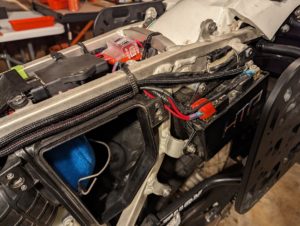
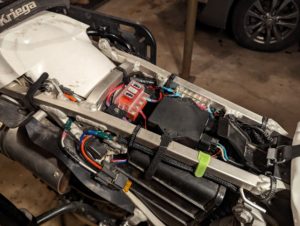
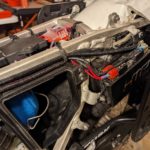
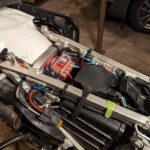
Electrical
For long trips, powering electronics like my GPS and phone is essential. I also wanted to make sure I could run heated grips and a heated vest when the weather gets a bit chilly.
The charging system on the DRZ is hooked into the main wiring harness instead of directly to the battery. To minimize voltage loss and enhance reliability, I ran wire directly from the regulator/rectifier into the battery, buying about 0.5V of extra charging power (free power mod). The battery on the DRZ is also pretty small to save weight, and I have killed it out in the woods after dropping the bike & flooding the carb. To buy a bit more wiggle room, I installed the Happy Trails battery upgrade kit, increasing cold cranking amps by 170%.
The DRZ’s wiring harness only has a single 20A fuse near the battery and limited space for wiring accessories directly into the battery. To address both of those issues, I added a fused terminal block under the seat hooked directly to the battery for my SAE lead and USB port (so I can continue charging devices after arriving at camp). I added a relay under the right side panel (triggered off the tail light) for accessories that I don’t want to accidentally leave on (GPS, heated grips). Most wiring was sheathed with wire loom or extra electrical tape where it might vibrate against body panels or the frame to reduce chafing


Protection
Bike armor is essential for any bike that’s intended to leave the pavement.
- Barkbusters VPS Hand Guards protect hands from brushes and levers from crashes. The aluminum-backed VPS hand guards have adjustable wind deflectors to cut down on wind chill
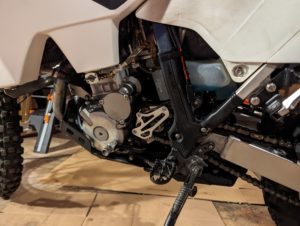
- Thumpertalk Case Savers protect the lightweight but fragile magnesium side covers of the DRZ’s engine. Without them the brake pedal and shift lever can puncture the side covers in a crash.
- Polysport Frame Guards are mostly to protect the frame’s paint from being rubbed off by my boots. They have the side benefit of adding a bit more grip for the ankles in an aggressive standing position.
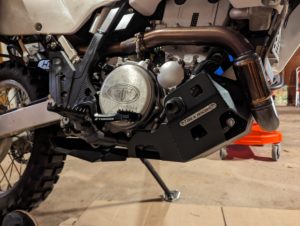
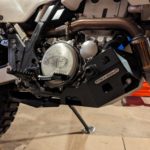
- T-Rex Racing Skid Plate to protect the underside of the engine but has extended coverage over the stator cover, water pump, and shock linkage. I went with this slightly heavier skid plate to (hopefully) help keep dust & mud out of the swing arm & linkage bearings on the long, calcium chloride treated dirt roads in Alaska & western Canada. The downside is a slight increase in weight (~1lbs) and lower ground clearance (~0.75″) compared to a standard skid plate, so I’m not necessarily planning on running it for technical riding. I also had to modify the skid plate to fit around the FMF Powerbomb Header’s expansion chamber.
- Works Connection rear caliper guard to protect the rear caliber in tip-overs riding rocky New England trials.
- DeVol Racing Aluminum Rear Disk Guard to replace the stock plastic disk guard, which had already been beaten up by rocky New England trails.
- DeVol Racing Radiator Guard to protect the radiator fins from rocks & sticks off road. I did have to trip the top-left corner to clear my aftermarket fuel tank.
- B&B Off Road Engineering Front Sprocket Guard/Case Saver replaces the OEM front sprocket cover. The stock cover is fragile magnesium and easily packs with dirt & mud, while this engine guard is 6mm thick aluminum with a skeletonized 4mm thick cover designed to self clean and save the engine if the chain breaks.
Most of these fall under standard protection for any dual sport, but a few items (like the disk guard, frame guards, and larger skid plate) were added based on damage & wear I’d seen on the bike over time.


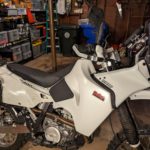
Ergonomics, Comfort, Range
The DRZ is definitely not designed for all-day comfort. A few basic mods helped to make the bike more comfortable and adjust the fit for my body & preferences.
- IMS Footpegs for a wider standing platform with more grip in the dirt.
- Zeta Revolver Shift Lever & Trigger Brake Pedal add fine-tuning to the position of the shift lever and brake pedal. The DRZ comes with really good, folding foot controls, but I couldn’t quite get them positioned right for stiff motocross boots (that and I like the aesthetic of the black anodized controls on my all-white bike).
- ODI Handlebar & Tusk Bar Risers add a lot of strength compared to the OEM handlebar (which bent the first season I had the DRZ). I first added the bar risers to give me more clearance to mount my navigation setup on the bar, but really liked the higher position and kept them even after switching to the fairing mounted nav.
- Koso Apollo Heated Grips add a lot of comfort on chilly mornings. I like these in particular because of the integrate the heat controls in the grip, simplifying wiring and give me one less thing to mount on the bars.
- Seat Concepts Comfort Seat to replace the 2×4 that the DRZ comes with from the factory. I started off with the low model for my first few years with the bike, which let me comfortably flatfoot the bike at stops. After getting more comfortable on the bike, I swapped for the standard version for the flatter seat and increased foam.
- Doubletake Adventure Mirrors are bullet proof and easily fold out of the way in a tip-over off road


Those mods are things that I’d likely run even without having adventure-touring intentions for my build. For extended range, I also added (and went through several iterations of) larger capacity fuel tanks, wind protection, and navigation/instrument mounting.
My first choice of gas tank was the Acerbis 3.7 gallon, but I had endless problems with fuel leaks around the fuel valve. The Clark 3.9 gallon tank was great and mostly preserved the lines & shape of the bike. For East Coast riding (and really anything in the Continental US) it has more than enough range (~200mi), but I’d need to carry extra fuel for the sparser stretches of the Dempster or Dalton Highways on the Arctic trip.
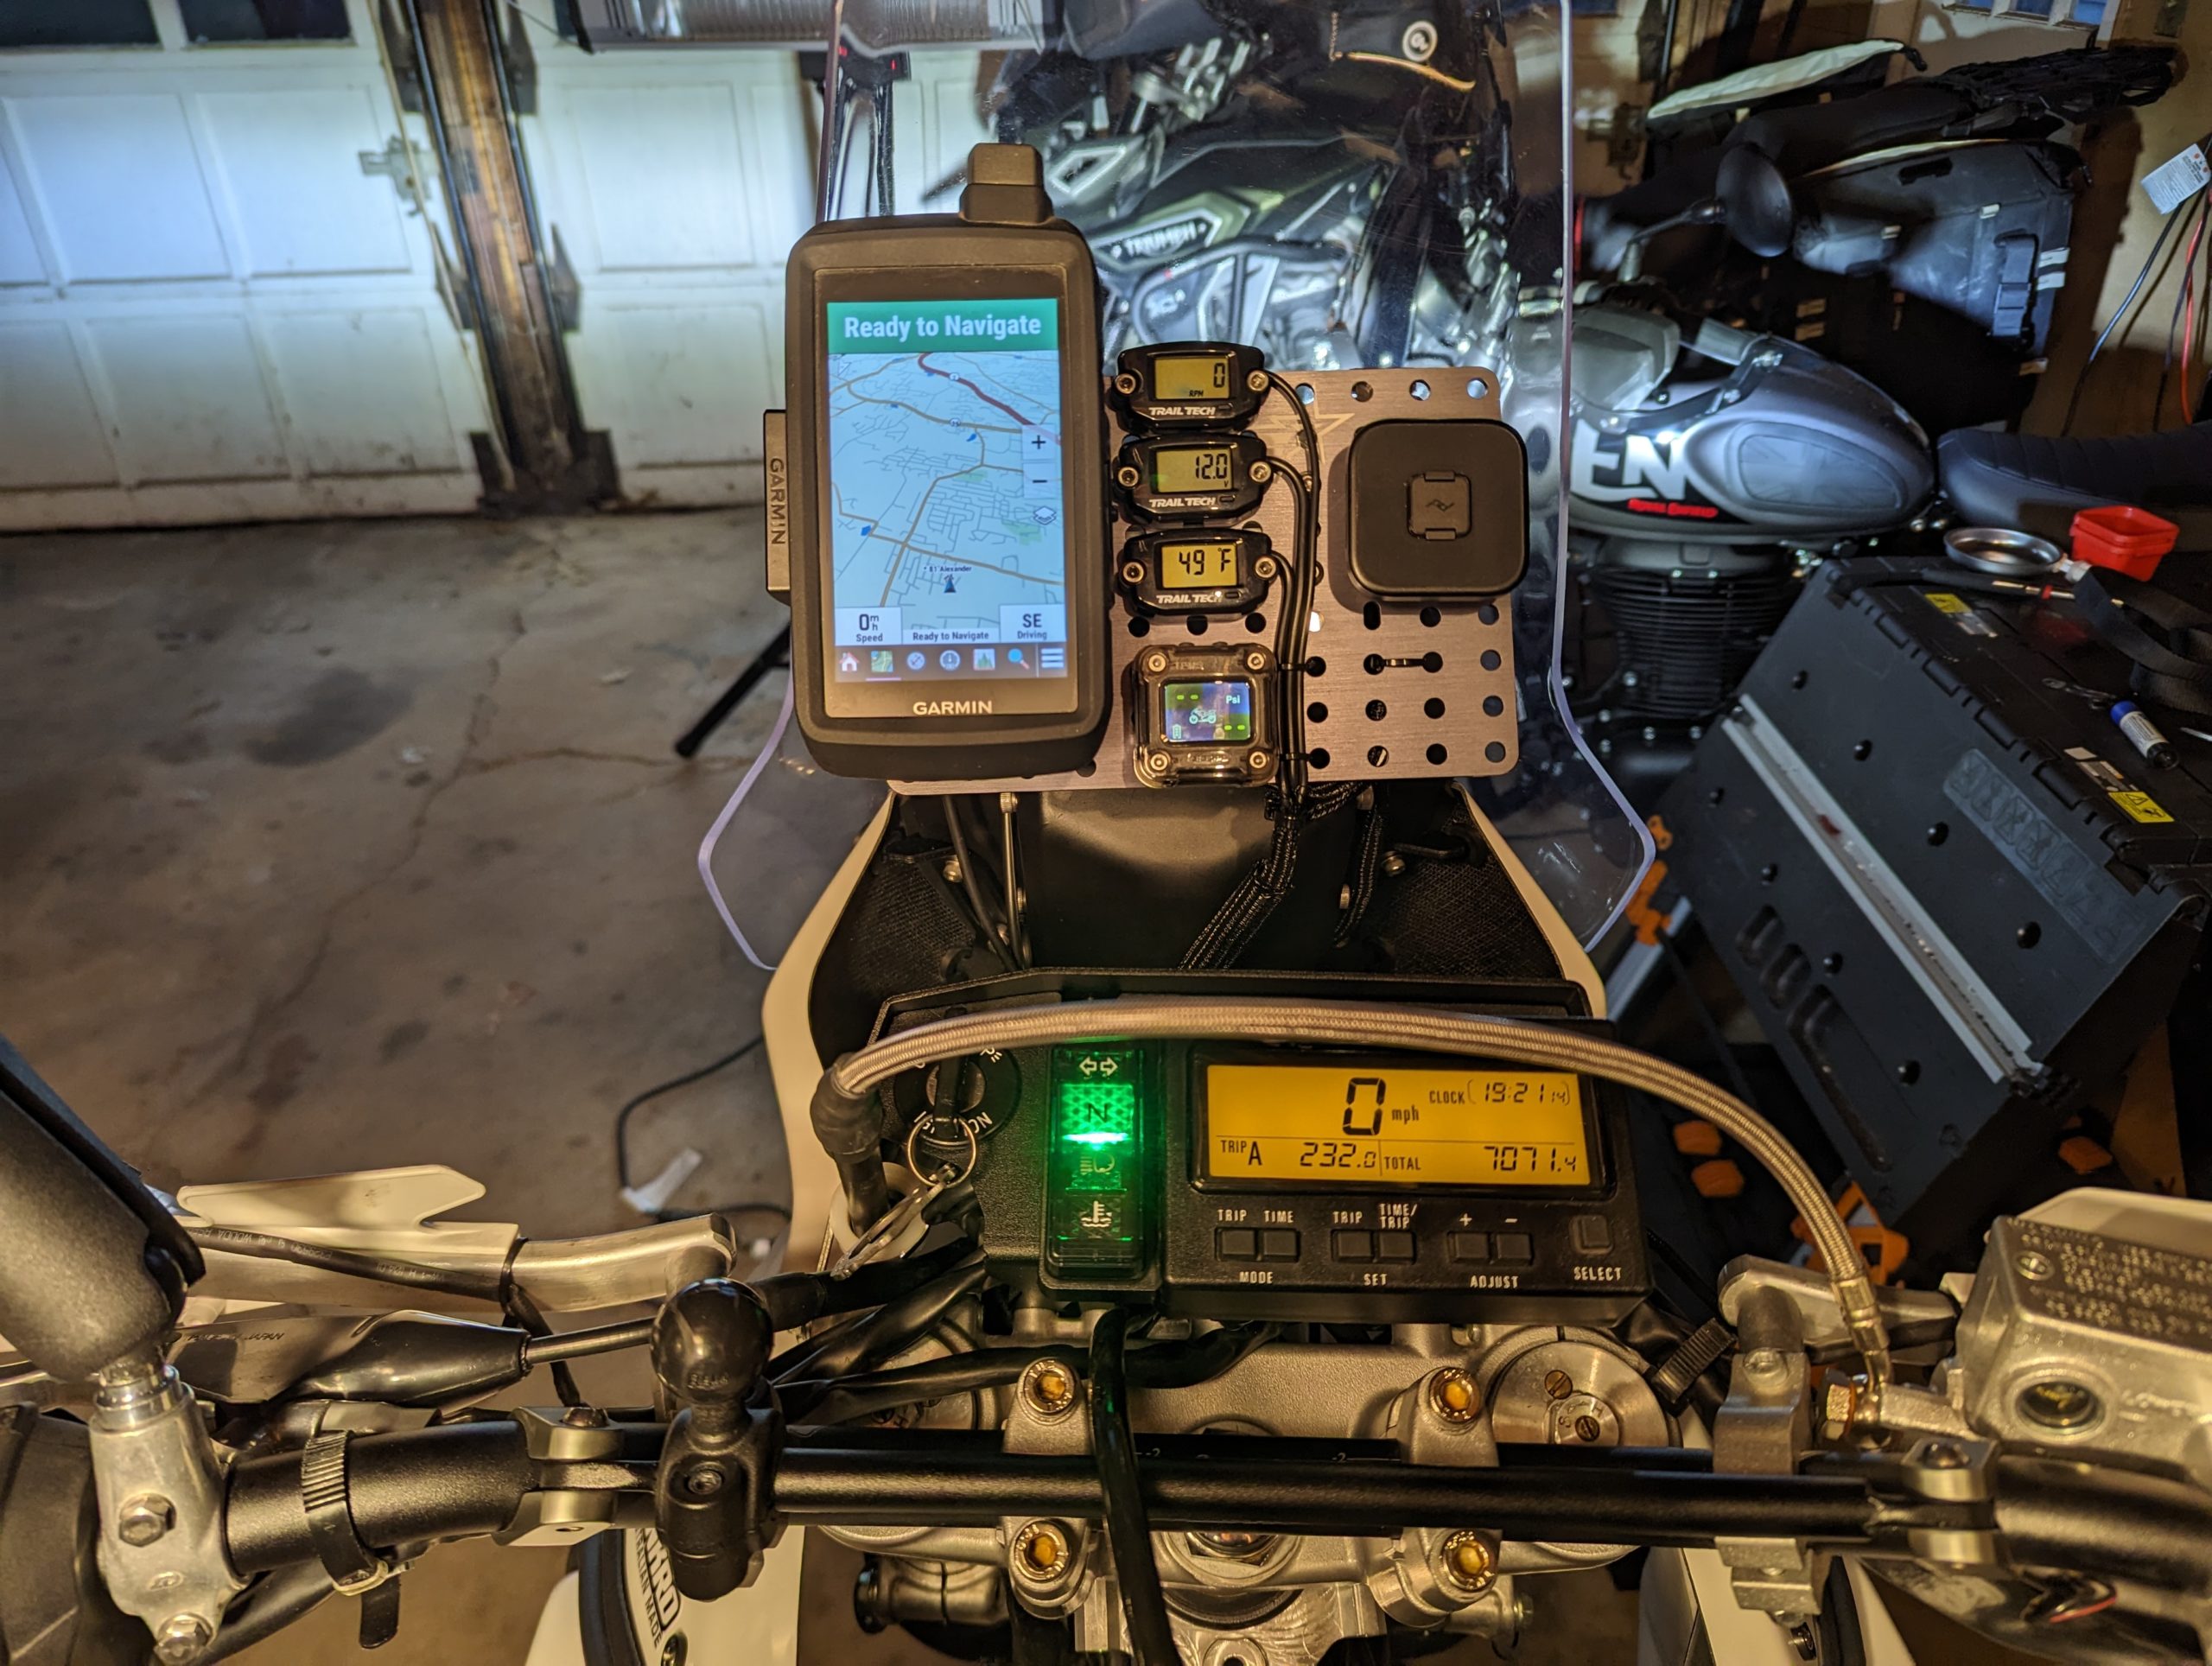
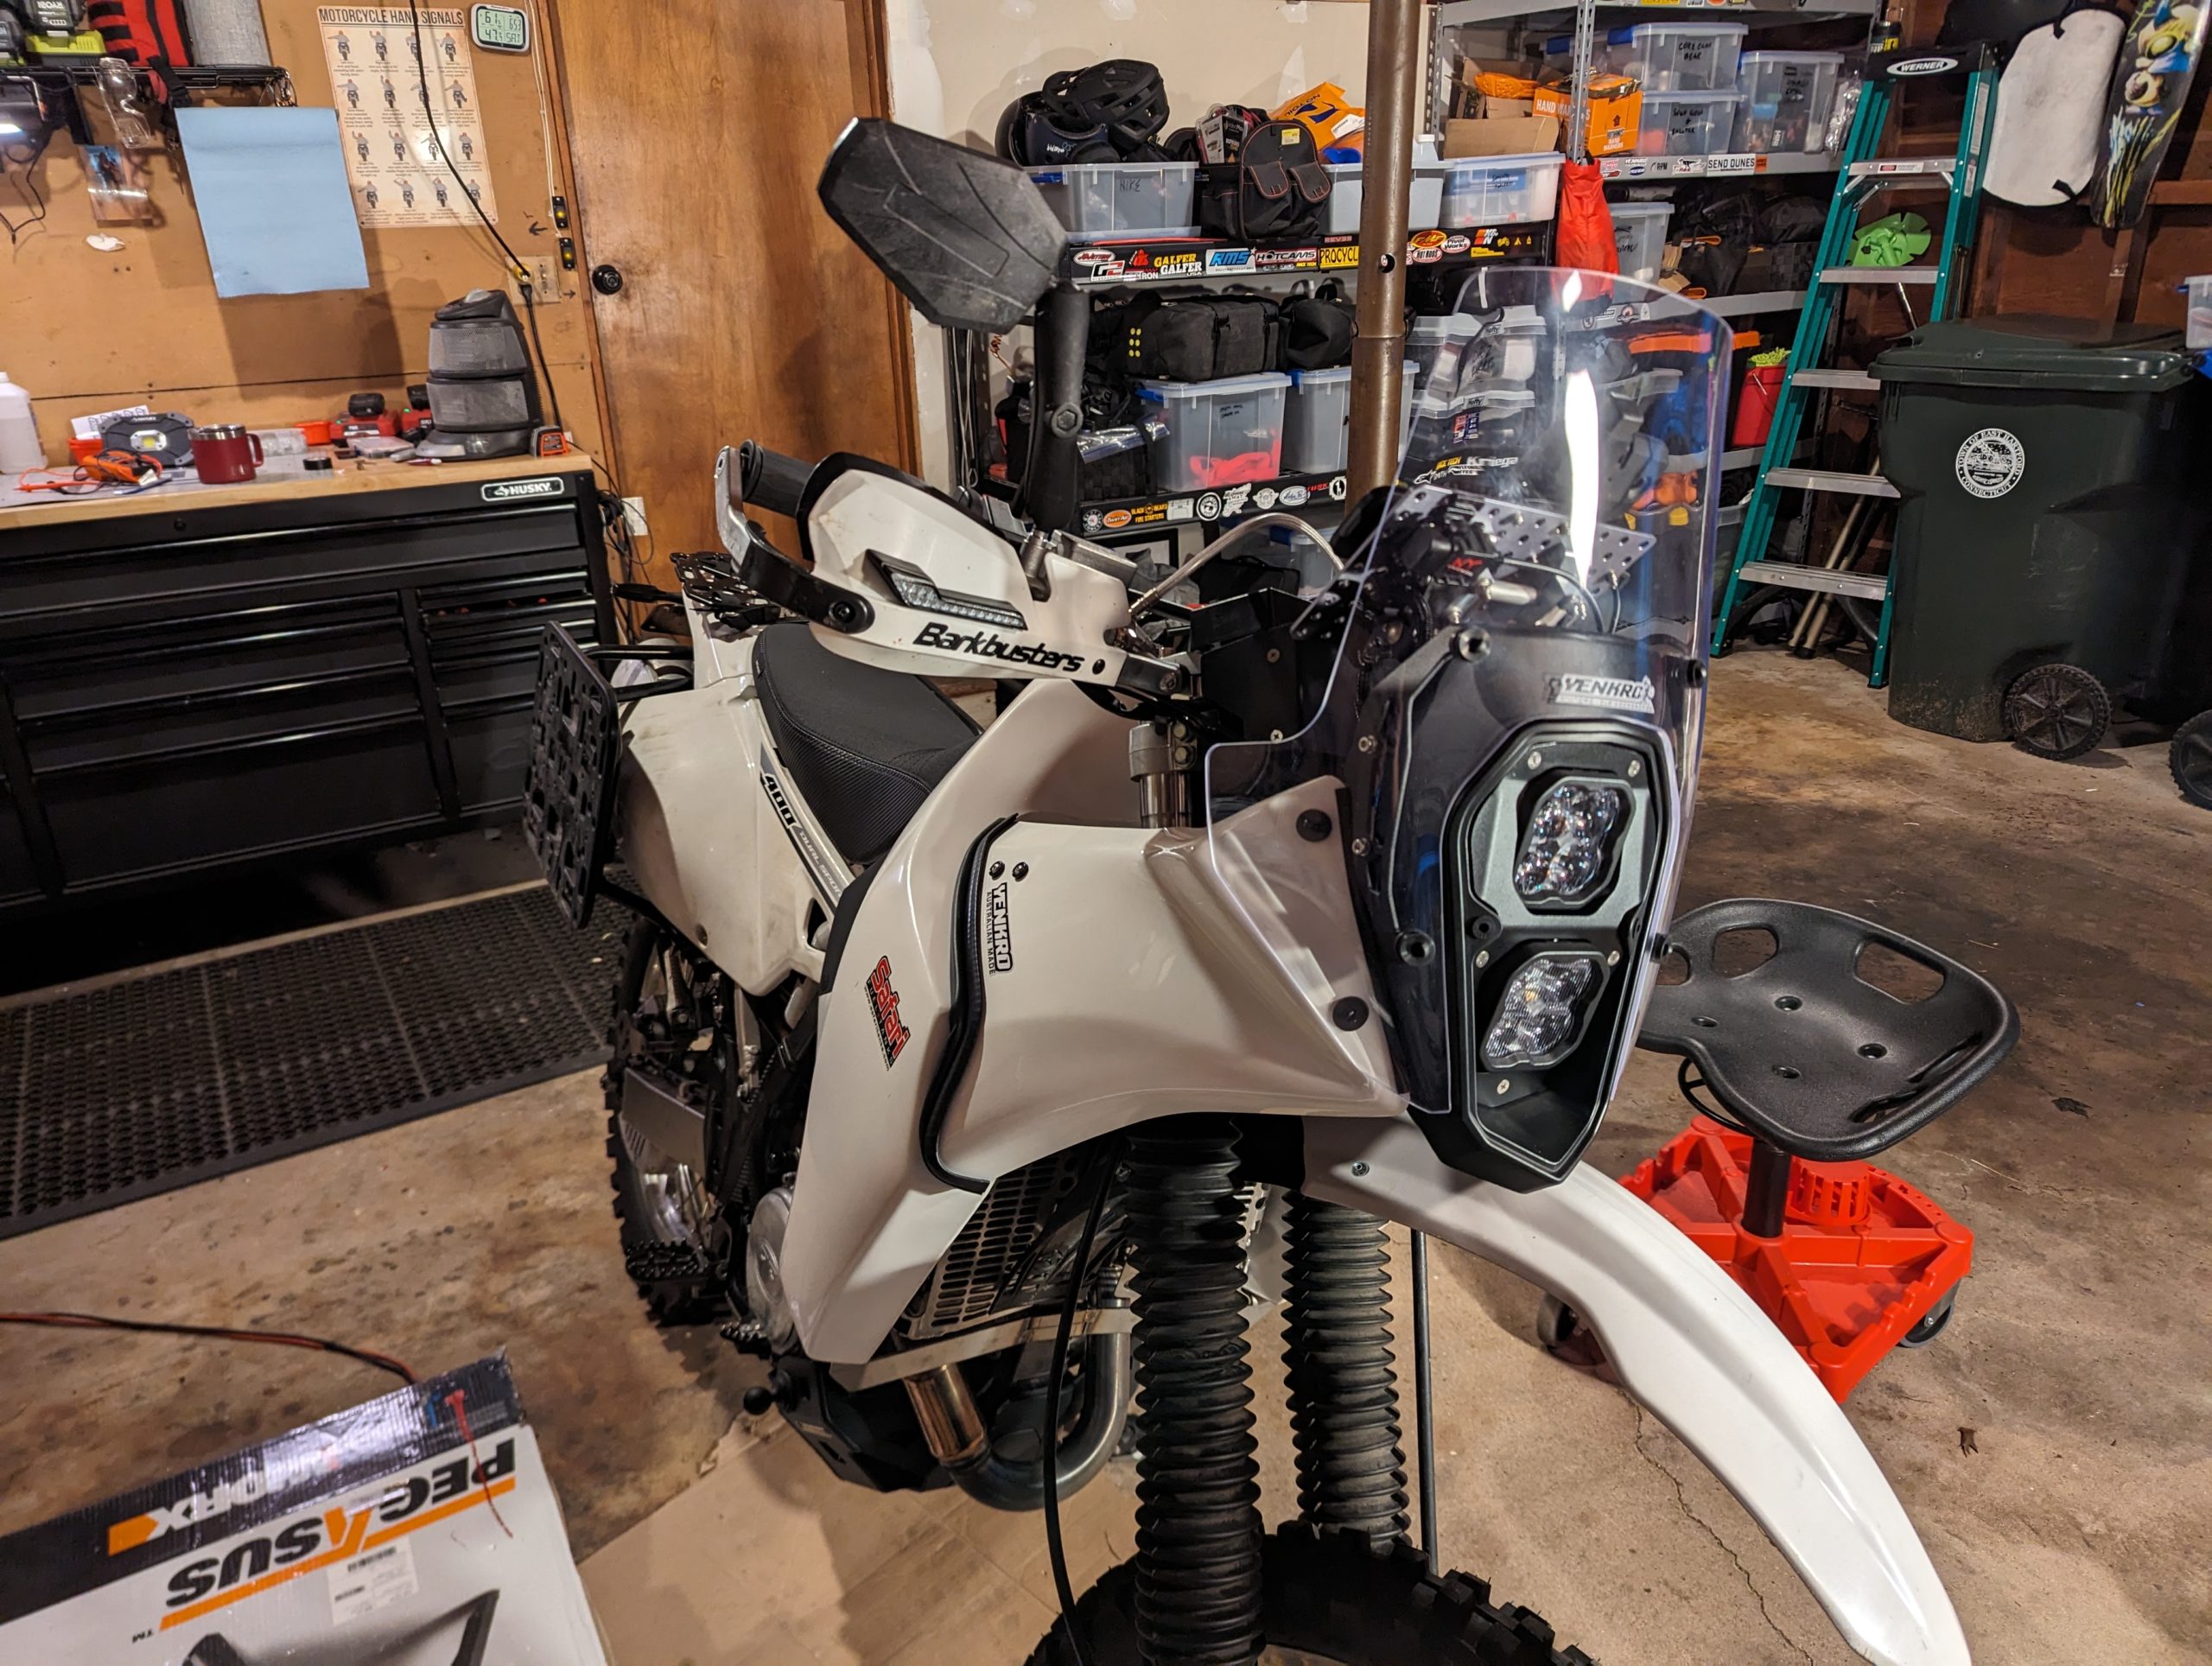
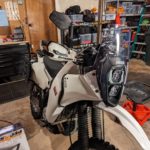
After spending the riding season testing in ’23, I decided to change up the front end of the bike with a Safari 28L gas tank (about 7.4 gallons) and Yenkro frame-mounted fairing. I was never a fan of the look of the big Safari tanks with the stock headlight cowl, but I really love how the Yenkro fairing’s side panels integrate with the tank. The extra range should be enough to handle the more desolate stretches of the Arctic highways while keeping the weight centralized (compared to strapping an extra 4 gallons of gas to the back of the bike). In practice, I’ll likely run with ~4 gallons of gas in the tank until I need the additional range to keep weight down.
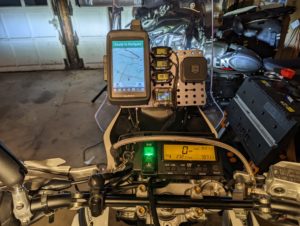
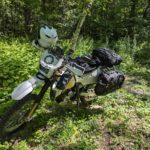
While I liked my initial nav setup (pictured above), the windscreen and extra navigation gear being mounted to the bars negatively affected handling and lead to instability in high winds. The frame-mounted fairing takes the weight and wind pressure off the steering and de-clutters the handlebars. I also love the rally-inspired aesthetic for the bike. The fairing kit includes two sizes of windscreen, has plenty of space for mounting nav equipment & instruments, and a bracket to relocate the stock speedometer and wiring.
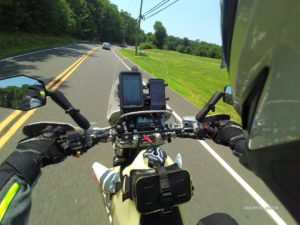
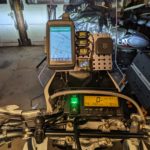
My navigation & instrument panel includes a Garmin Montana 700 GPS; Trailtech TTO tachometer, voltage, and coolant temperature meters; Cyclops TMPS display; and a Peak Designs vibration-damping phone mount. I also have a keyed USB port on the side of the tower and an always-on USB port tucked behind the panel.
The Yenkro fairings are hand-made by an Australian guy named Joe in his garage. Luckily, Joe is both an adventure motorcyclist and industrial engineer and his garage just happens to include industrial manufacturing equipment like vacuum molds for composite manufacturing and laser cutters. The kit comes mostly-assembled, and other than trying to figure out how to squeeze all of my extra accessory wiring into his harness box was the install pretty straightforward.
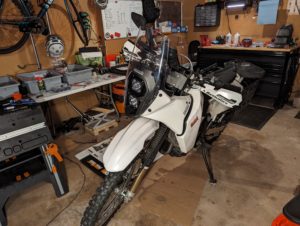
In the photos below I was waiting for nightfall to aim the headlights, so the lexan headlight guard has not yet been installed.


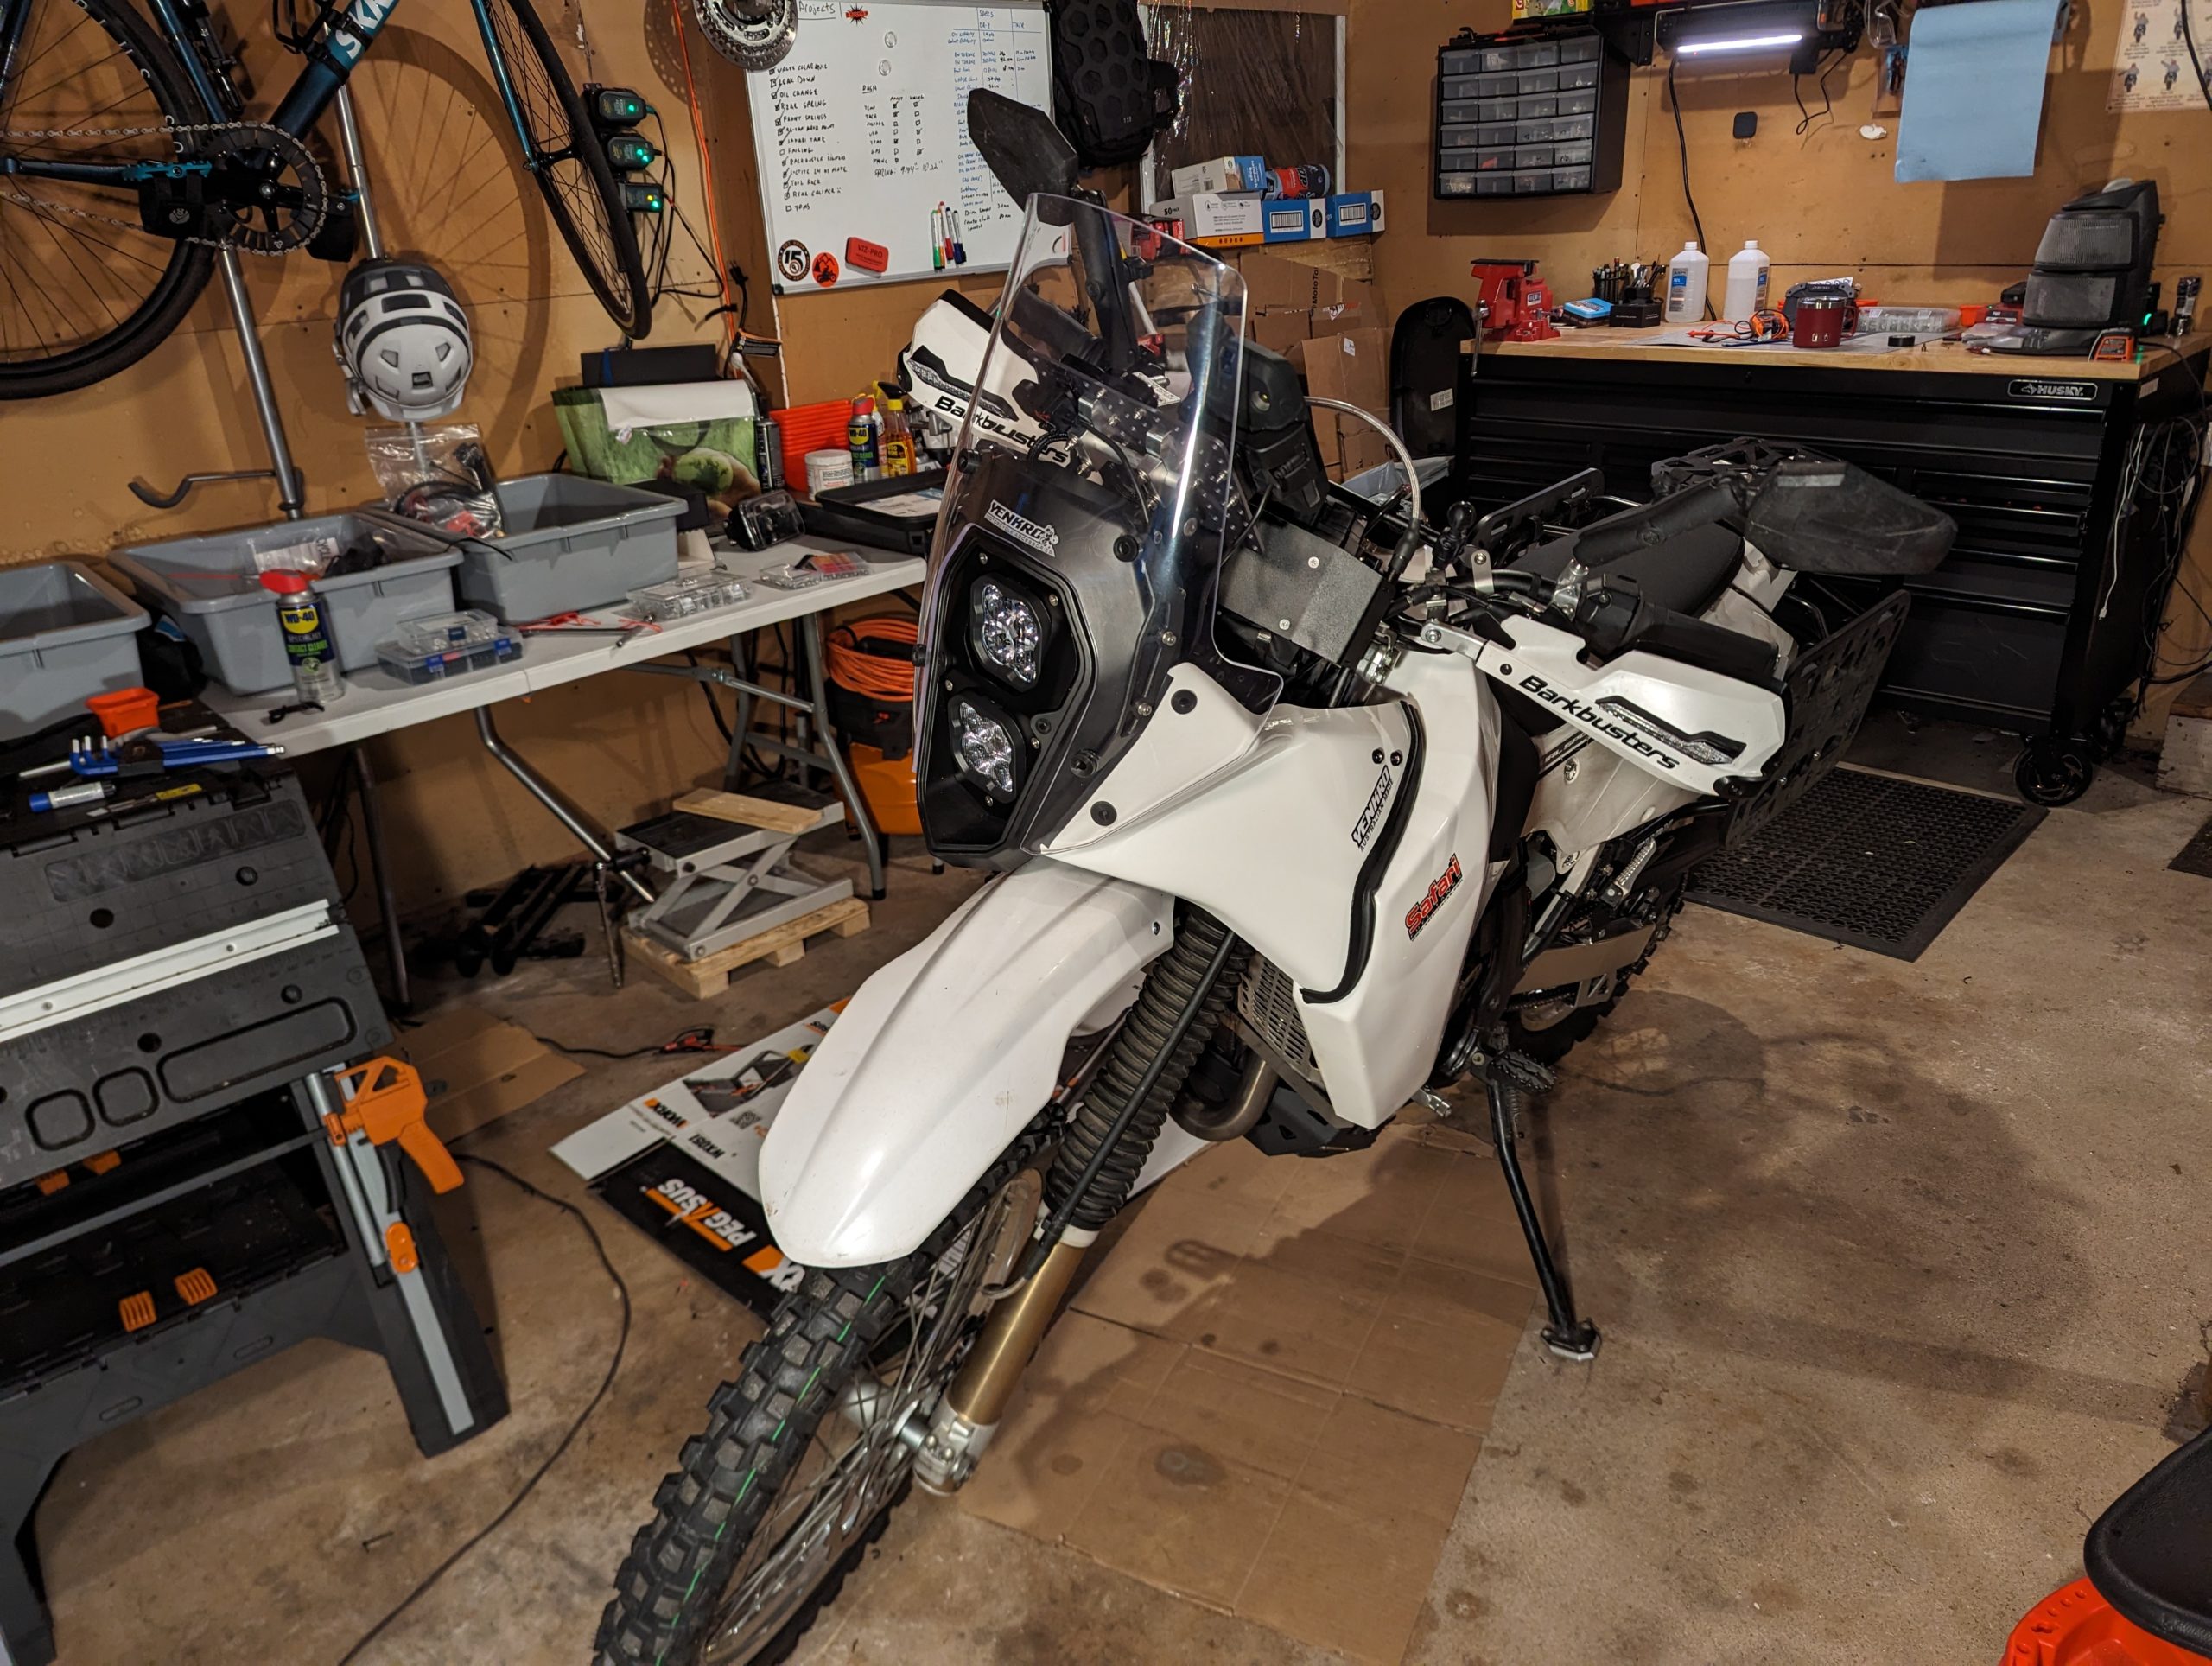
Luggage
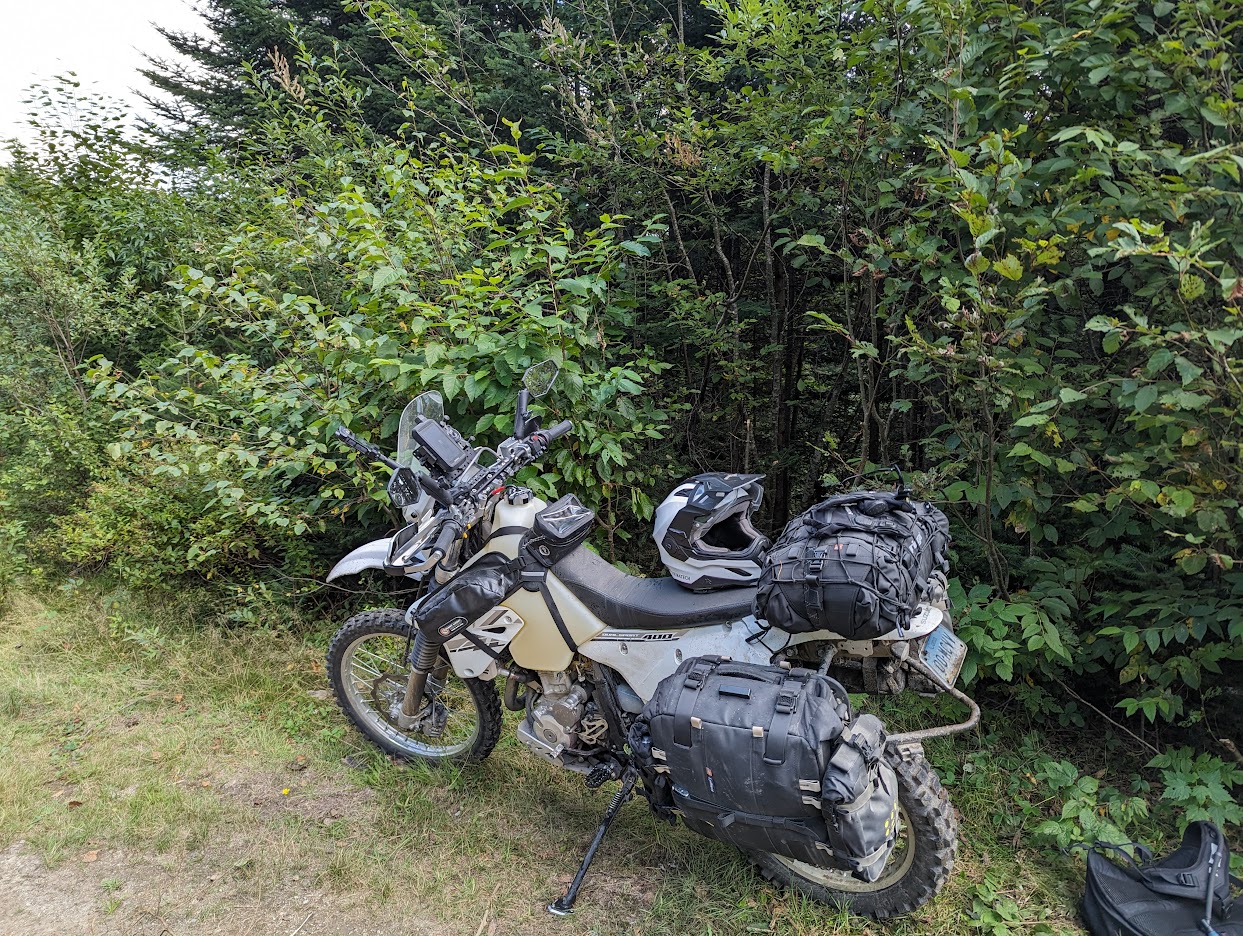
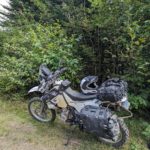
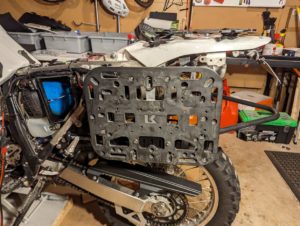
For shorter, off-road focused trips I prefer to run the Kriega rackless luggage, but for longer trips and commuting I prefer the flexibility & convenience of Tusk luggage racks and soft panniers. The Tusk luggage racks help to reinforce the subframe of the bike for heavy loads and are positioned low and forward for better weight distribution. I also have a Skagg tail rack for strapping tail bags or a duffel.
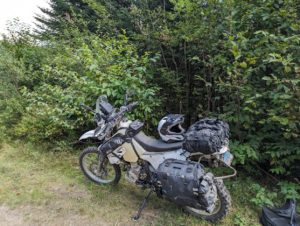
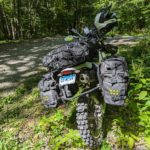
For general riding & commuting I run the Giant Look Buck’n’Roll tank bag and Klamath tail bag. On longer trips I’ll swap out the tail bag for a duffel and add the Giant Loop tank panniers for some additional storage of quick-access items (see picture above).
After a lot of experimentation, I’ve landed on the Kriega OS system for my travel luggage. The OS-Platform offers a huge variety of mounting options for panniers, smaller dry bags, or whatever you could possibly want to strap to them. I have a set on both bikes so I can swap my luggage between them as needed. Because they’re constructed of 10mm nylon instead of aluminum or steel, they’re incredibly lightweight and easy to modify if you need to customize them at all. I added the Happy Trails tool rack to the inside of the left luggage platform, letting me carry tools in a way that’s out of the way but still accessible.

The Kriega OS Series dry bags and panniers have a ripstop Cordura body with Hypalon reinforcement in high stress & abrasion areas. The inner waterproof liners are removable and washable/replaceable as they get beat up, and all Kriega luggage (even their hydration packs) feature mounting loops for extending storage with additional dry bags (or anything you want to strap to them with g-hooks). It’s a really high quality, modular luggage system. I mix and match the drybags (6L, 12L, 18L) on the pannier racks as needed for day trips.
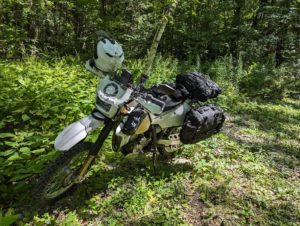
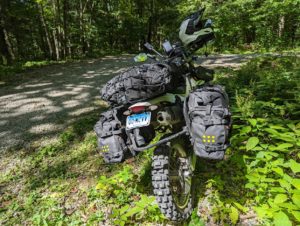

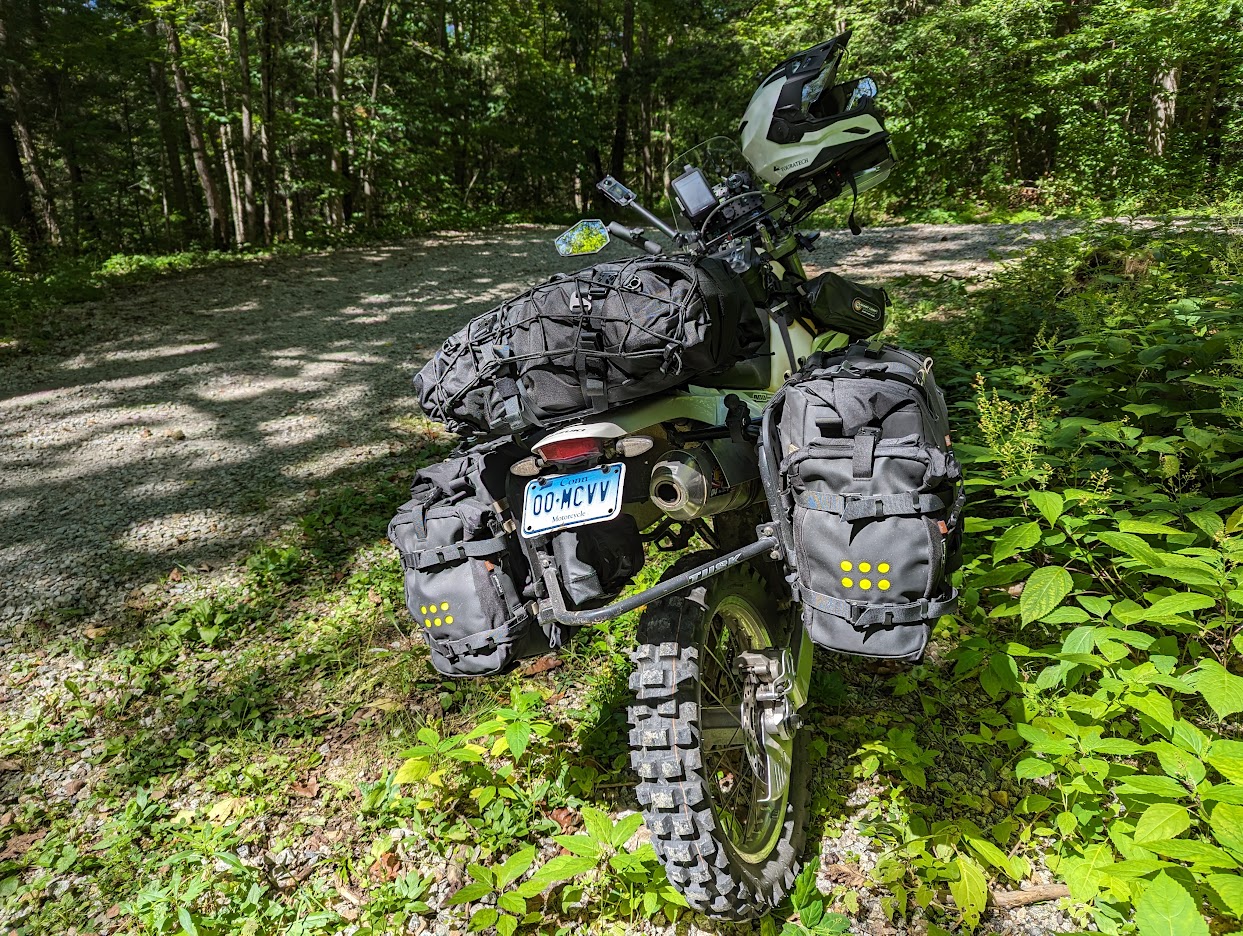
Both of my bikes have asymmetrical luggage racks (for exhaust clearance), so I run a 38L pannier on the left and 32L on the right for long trips and a 32L left and 22L right for commuting. On long trips, I add a bottle holster (for coffee) & first aid kit to the fronts of the panniers and a 6L drybag to the back of each for lightweight quick-access items (waterproof shells, spare gloves, etc).
The duffel bag is the US40 Rack Pack. It’s technically from their street riding line (US series) instead of their adventure line (OS series), but features very similar construction to the OS bags. Its a double-ended side rolls let it expands from 30L to 40L, depending on the length of the trip. There are loops on top for expanding the storage with two 6L dry bags or one of the larger (12L/18L) bags. It also features a tent pole tunnel between the body of the bag and the top Hypalon panel, which I’ve found to be perfect for spare tubes or a gas bag.
Mechanical / Maintenance Issues
While the DRZ is a famously reliable motorcycle, it’s not without it’s known issues. Most are minor watch-items that can be easily addressed with a little bit of preventative maintenance once you know to look for them.
Other than the items linked above, the first and most critical issue using a DRZ as a travel bike is oil consumption. It’s not unusual for a DRZ with a relatively healthy engine to consume 1/4 to 1/2 quart of oil every 1000 miles, especially if it’s consistently ridden at high RPMs. Because it’s a dry sump system (oil is stored in the frame and cycled through the engine) it’s not a concern as long as you stay on top of it and change the oil regularly. On a long trip (>2000mi), I’ll bring an extra oil to top off as needed and change oil at least every 2-3,000 miles.
Another watch item is the chain guides & swing arm. If you’re running at the lower end of the chain slack specification (40mm-50mm) and bottoming the suspension regularly, the chain will be pulled tight against the leading edge of the swing arm and quickly wear through the polymer guards protecting it, eventually eating into the swing arm itself. Running at the higher end of the slack specs and making sure you the suspension sag set properly largely alleviates the problem, but it’s good to keep an eye on it and proactively change the guards.